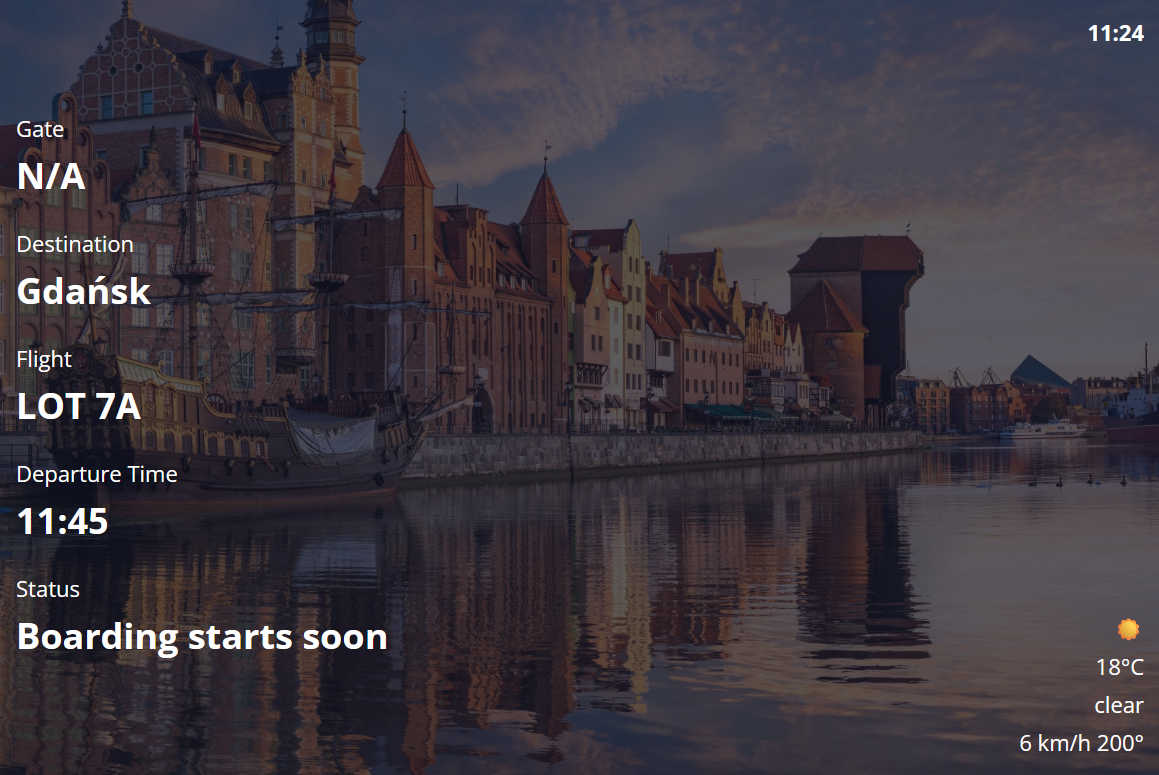
Boarding Screen
The boarding screen mimics what passengers see at a real gate — flight number, gate, destination, status, weather. Use it inside the desktop app for ambience, or push it to a TV / tablet so the rest of your setup looks like an actual airport.
Where It Lives
The boarding screen runs in the cloud. Cabby on your simulator PC streams the live state to our servers; any browser then loads the rendered screen at:
https://flyingart.dev/cabby/screen/flight/{flightId}/boarding
Or, for a permanent display in your sim room, the per-user form that always tracks your latest flight:
https://flyingart.dev/cabby/screen/user/{yourUserId}/boarding
See Passenger Screens for the full story on the two URL forms.
The desktop app already embeds the boarding screen in the Boarding tile on the flight page — that tile is just an iframe pointing at the per-flight URL. You don't need a local server, a port-forward, or a LAN setup.
Layout Options
There are four boarding layouts. Each one shows the same data in a different visual style — pick whichever matches your setup or mood.
In the desktop tile, hover the screen to reveal the layout selector at the top. On a fullscreen browser, the same selector appears when you mouse near the top edge.

The layout choice is reflected in the URL (?screen=2, etc.), so once you pick one you can bookmark it on the external device.
External Display Setup
You have two ways to put the boarding screen on a second display:
1. Open in Browser (recommended)
In the desktop app's boarding tile, hover and click Open in Browser. Your default browser opens the cloud URL for the active flight. Drag the window onto your secondary monitor / TV and put it fullscreen (F11 in most browsers).
2. Type the URL on Another Device
Any device with a modern browser works — phones, tablets, smart TVs, a spare laptop. Just visit:
https://flyingart.dev/cabby/screen/flight/{flightId}/boarding
Get the {flightId} from the URL the desktop tile opens, or share it via your usual channel (Slack, email, AirDrop, QR code).
For a tablet or smart-display you want to leave running between sessions, use the per-user URL instead — it survives flight-id changes:
https://flyingart.dev/cabby/screen/user/{yourUserId}/boarding
Because the data flows through the cloud, the external device does not need to be on the same Wi-Fi network as your simulator PC.
Setup Tips
- Dedicated display — A small TV or old tablet in the cockpit area sells the immersion best.
- Disable sleep — On a tablet, enable Guided Access (iOS) or a kiosk launcher (Android) so the screen doesn't dim during long flights.
- Network blip protection — If the simulator PC briefly drops the connection, the screen shows a "Could not connect to Cabby" message after ~10 seconds and recovers automatically once the link is back.
- Wrong flight on screen? The boarding URL is bound to a specific
flightId. Start a new flight in the desktop app and re-open the URL from the tile.
The boarding screen is a small thing, but it's one of the cheapest ways to push your sim setup from "in front of a PC" to "at a gate".